Ultimate DIY Guide Plans for Custom Furniture
Unlock Your Inner Craftsperson: The Ultimate DIY Custom Furniture Guide
Tired of mass-produced furniture that lacks personality and quality? Ready to unleash your creativity and build pieces that truly reflect your style? This guide provides a comprehensive roadmap to crafting your dream furniture, from initial design to the final flourish. We'll equip you with the knowledge and confidence to tackle your next DIY project, turning your vision into reality. Forget generic, embrace unique!

Phase 1: Design & Planning – Laying the Foundation
Before you even touch a saw, meticulous planning forms the backbone of a successful project. This phase ensures you avoid costly mistakes and frustrating setbacks. Start by sketching your design, considering both aesthetics and functionality. Will your piece be a rustic farmhouse table, a sleek modern bookshelf, or a whimsical children's bed? Imagine the space it will occupy and how it will interact with your existing décor. Don't underestimate the power of a detailed sketch; it's your blueprint for success.
Choosing Your Materials: A Matter of Style and Strength
Material selection directly impacts the look, durability, and overall cost of your furniture. Hardwoods like oak, maple, and cherry offer exceptional strength and beauty, but come with a higher price tag. Softwoods such as pine and fir are more budget-friendly but may require more care and maintenance. Consider the intended use of the piece – a dining table will require a more robust material than a simple nightstand. Explore different finishes too; stains, paints, and varnishes can drastically alter the final aesthetic. Research different options thoroughly – the right material enhances both the beauty and longevity of your creation.
Measuring and Calculating: Precision is Paramount
Accurate measurements are non-negotiable. Measure twice, cut once! This old adage is crucial here. Carefully measure the space where your furniture will reside to ensure proper fit. Using accurate dimensions in your design, create detailed cutting lists. Consider adding a small margin for error in your cuts. Precise planning prevents frustrating adjustments during construction, saving time and materials. This meticulous approach is the key to a clean and well-fitting finished product.
Phase 2: Tools and Techniques – Mastering the Craft
The right tools significantly impact the ease and quality of your project. While you can certainly start with basic tools, investing in quality equipment will pay dividends in the long run. A well-stocked workshop makes the build process far more efficient and enjoyable.
Essential Tools for Success
- Measuring tape and square
- Saw (circular saw, jigsaw, hand saw)
- Drill and drill bits
- Screwdrivers (Phillips and flathead)
- Sandpaper (various grits)
- Clamps
- Safety glasses and dust mask
Remember safety first! Always wear appropriate safety gear, such as safety glasses and a dust mask, when operating power tools. Familiarize yourself with the operation of each tool before starting your project. Online tutorials and workshops can be invaluable resources for learning new techniques.
Joinery Techniques: Strength and Style
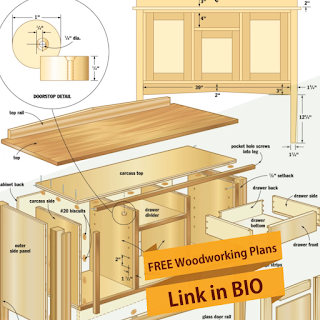
Learn basic joinery techniques like dowel joints, pocket hole screws, and mortise and tenon joints. These methods provide strength and stability to your furniture. Explore different joint options depending on the desired aesthetic and structural requirements of your piece. The choice of joinery can significantly impact both the structural integrity and the overall visual appeal of your finished creation.
Phase 3: Construction & Finishing – Bringing it All Together
With your plans finalized and your tools at the ready, it's time to begin the construction phase. Follow your detailed plans meticulously, taking your time and ensuring accuracy. Remember to check measurements at each step. Patience and precision are key.
Step-by-Step Assembly: A Guide to Precision
Assemble your furniture following the sequence outlined in your plan. Begin with the primary structure, securing each joint precisely. Utilize clamps to hold pieces firmly in place during gluing and screwing. Take breaks when needed to avoid fatigue and maintain focus. The careful construction process ensures a high-quality and durable finished piece.
Finishing Touches: Enhancing Beauty and Durability
Sanding is crucial for a smooth and even finish. Begin with coarser grit sandpaper and gradually move to finer grits. Apply stain or paint according to the manufacturer's instructions, ensuring even coverage. Finish with a protective sealant, like varnish or polyurethane, to enhance durability and protect against scratches and water damage. This final phase transforms your creation from functional to beautiful and long-lasting.
Phase 4: Celebrating Your Achievement – The Reward of DIY
Congratulations! You've successfully built your custom furniture. Admire your handiwork and bask in the satisfaction of a job well done. Your unique piece is a testament to your creativity and skills. Now, enjoy your personalized furniture and the pride that comes from making something beautiful with your own two hands.
0 Response to "Ultimate DIY Guide Plans for Custom Furniture"
Post a Comment